Wood: cat post
A great place for River & Max to sit!


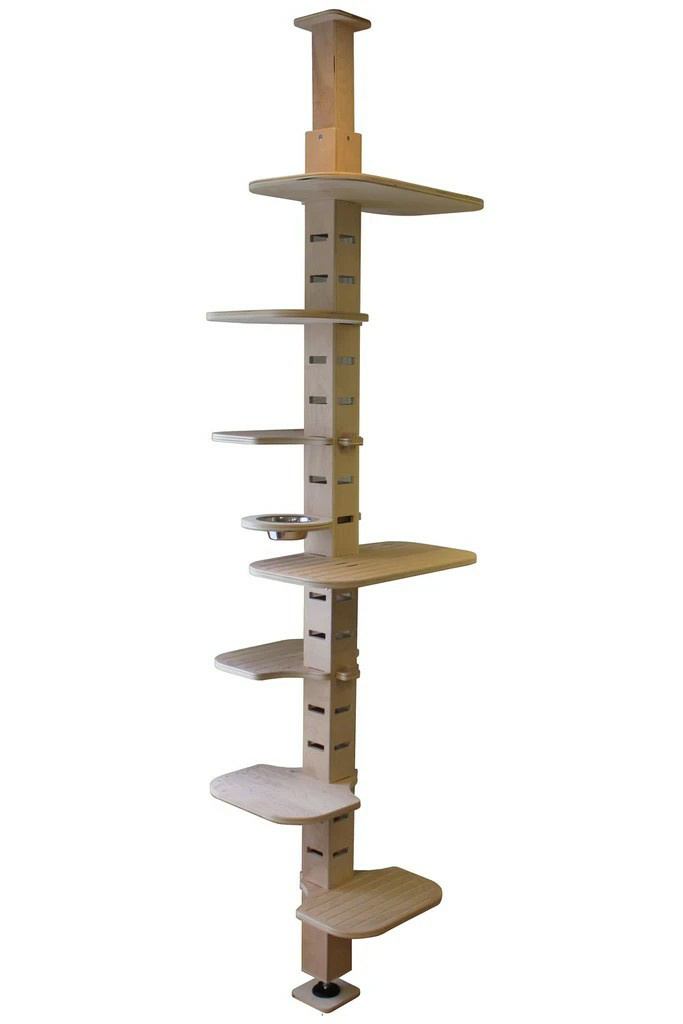
So, Ramon had an idea to make an awesome cat post in front of the window in our living room, so our cats River (7 years old) and Max (8 months old) have a great place to sit. Originally he wanted "to rip off a design of a beautiful modular cat birch with some modifications to fit my needs", as he described it (literally, I copied and pasted this). The original design being:
After fiddling around with different setups for a router jig, playing around with chisels and a lot of headache I concluded that my skills still needed more development before I will be able to create 4 identical faces with all mortices matching.
So back to the drawing board.
Attempt #2
I drew some inspiration from ContempoCat's "IKEA Hack". I still had a Douglas 4x2 and a board laying in the shed, both were rough sawn so I decided to make it out of solid woods all together.
This build is made up of 3 main parts.
- The base
- The pole
- The shelves
The base
For the base, since it’s not visible, I used a sheet of 18mm plywood. This was not a lot of work, I squared it up, flattened it out and put a little bevel on the edge after which I finished it with some linseed olie.
The pole
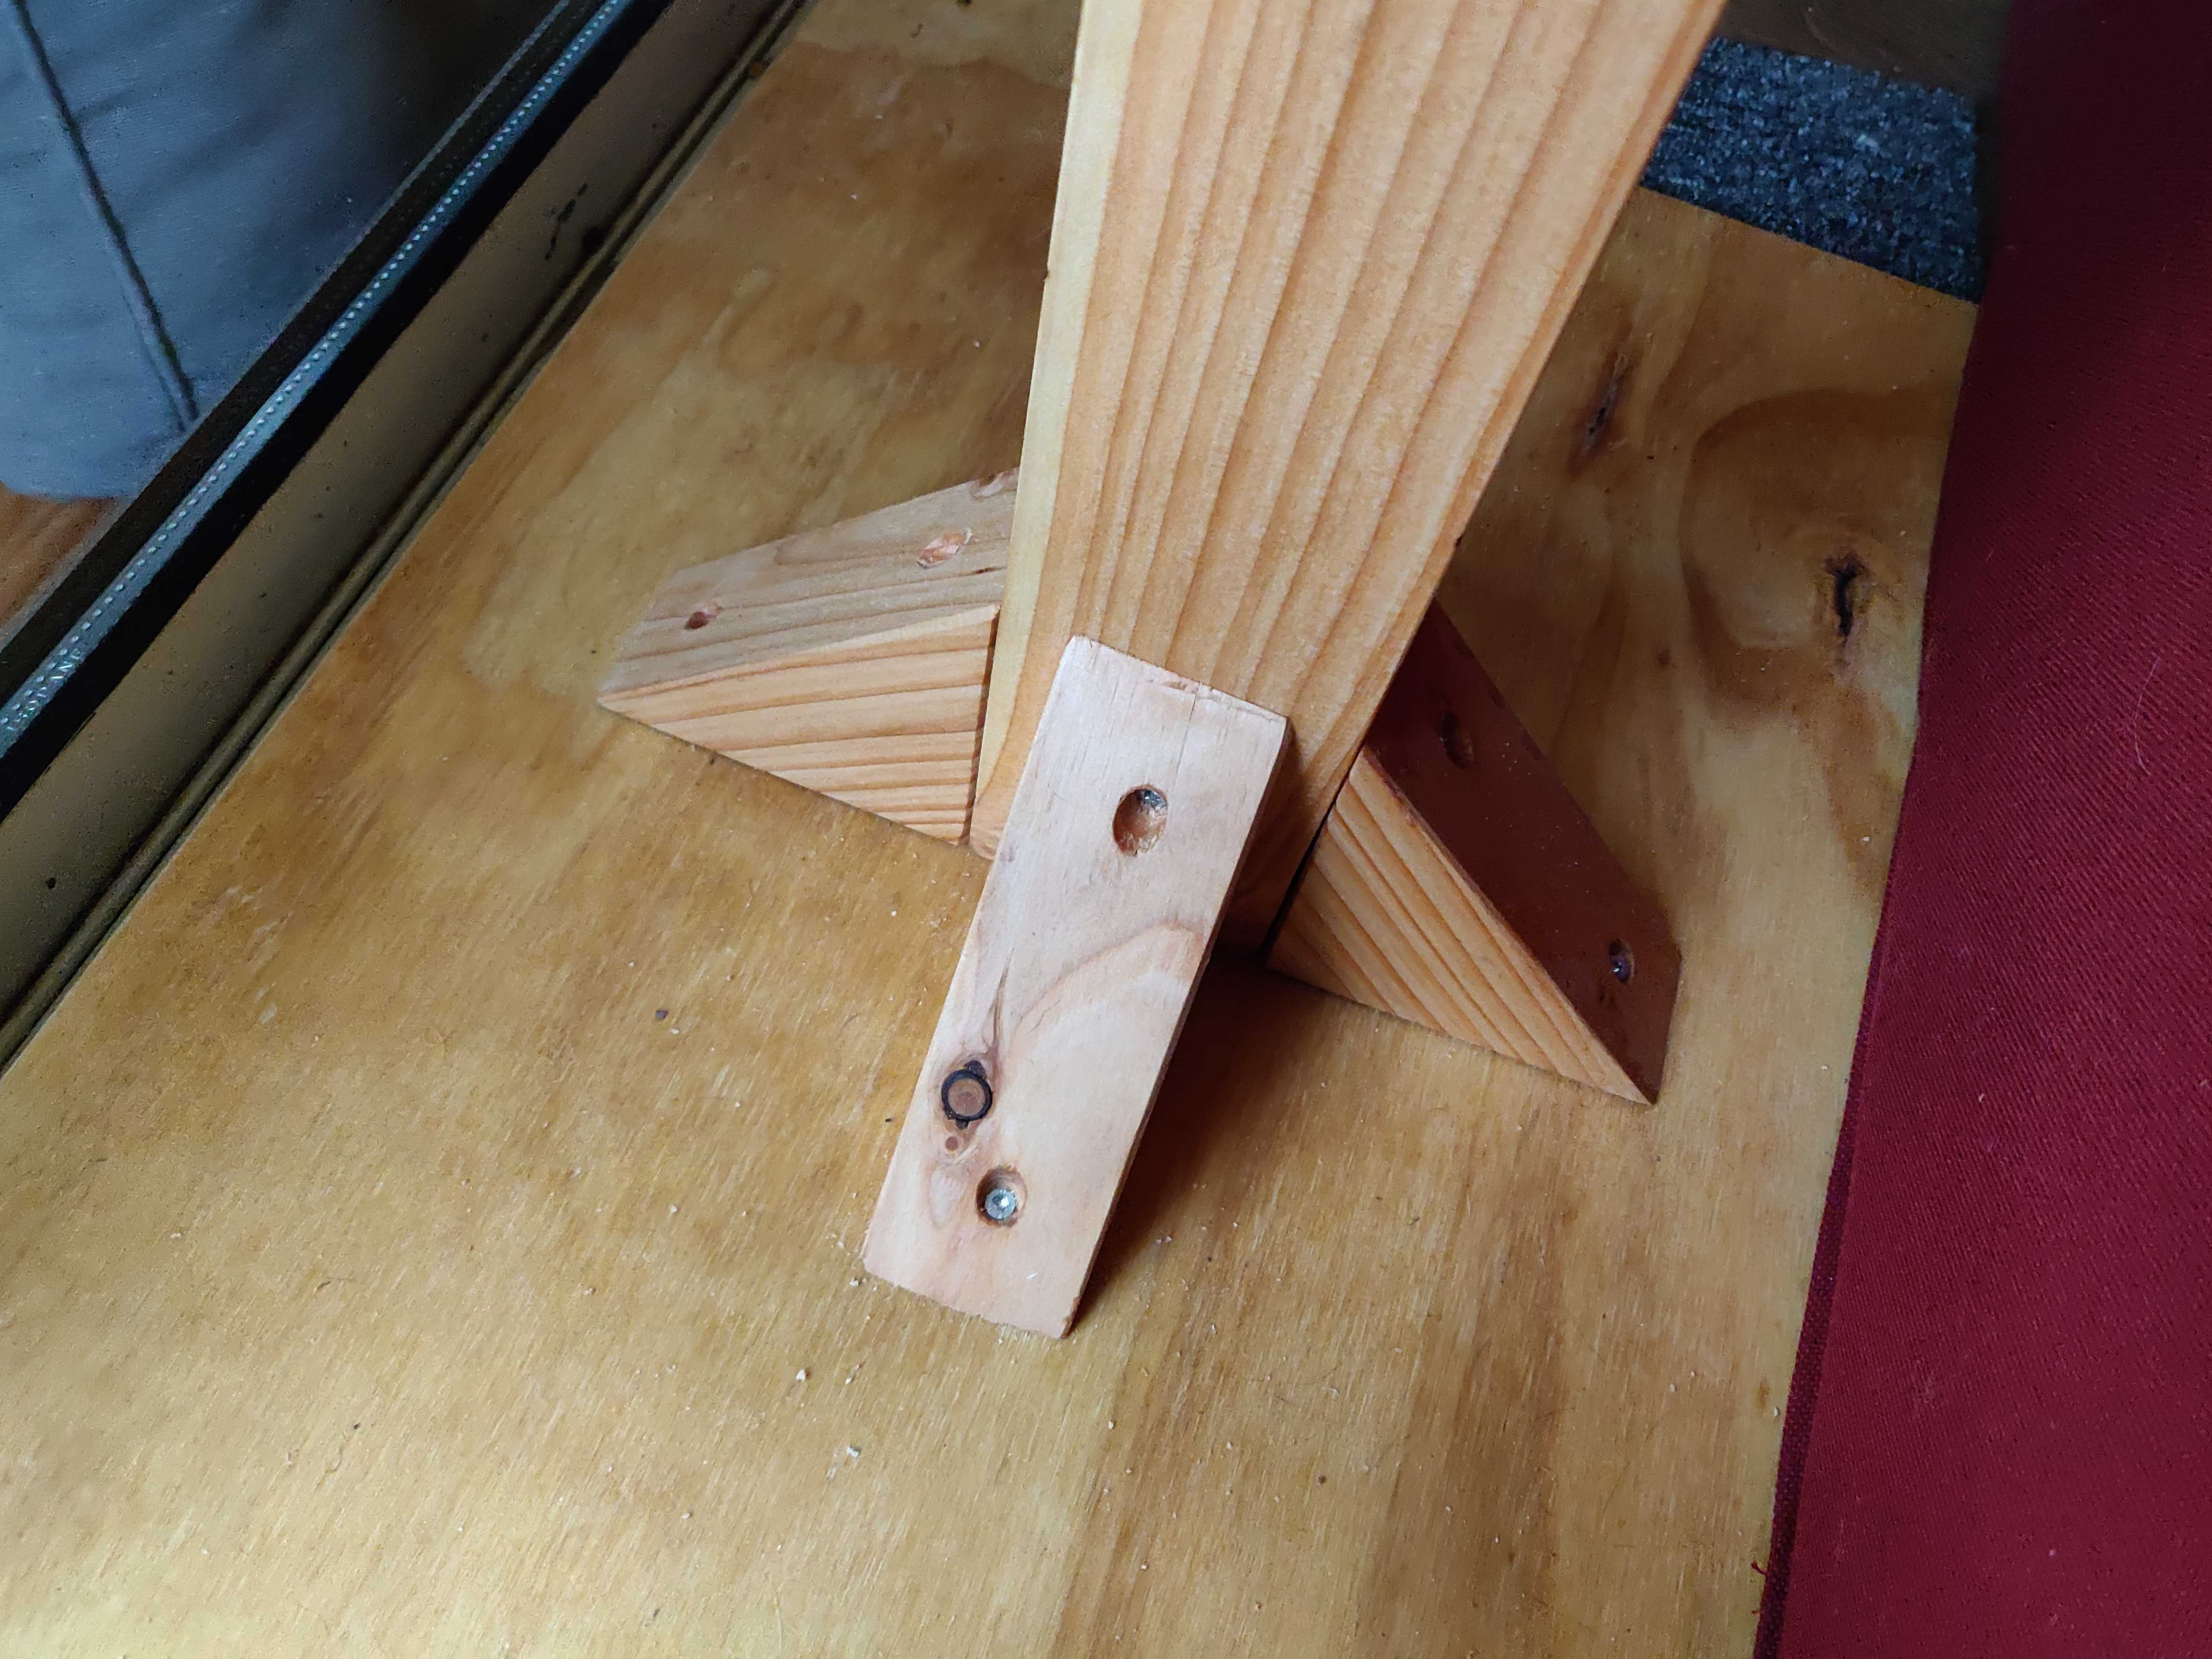
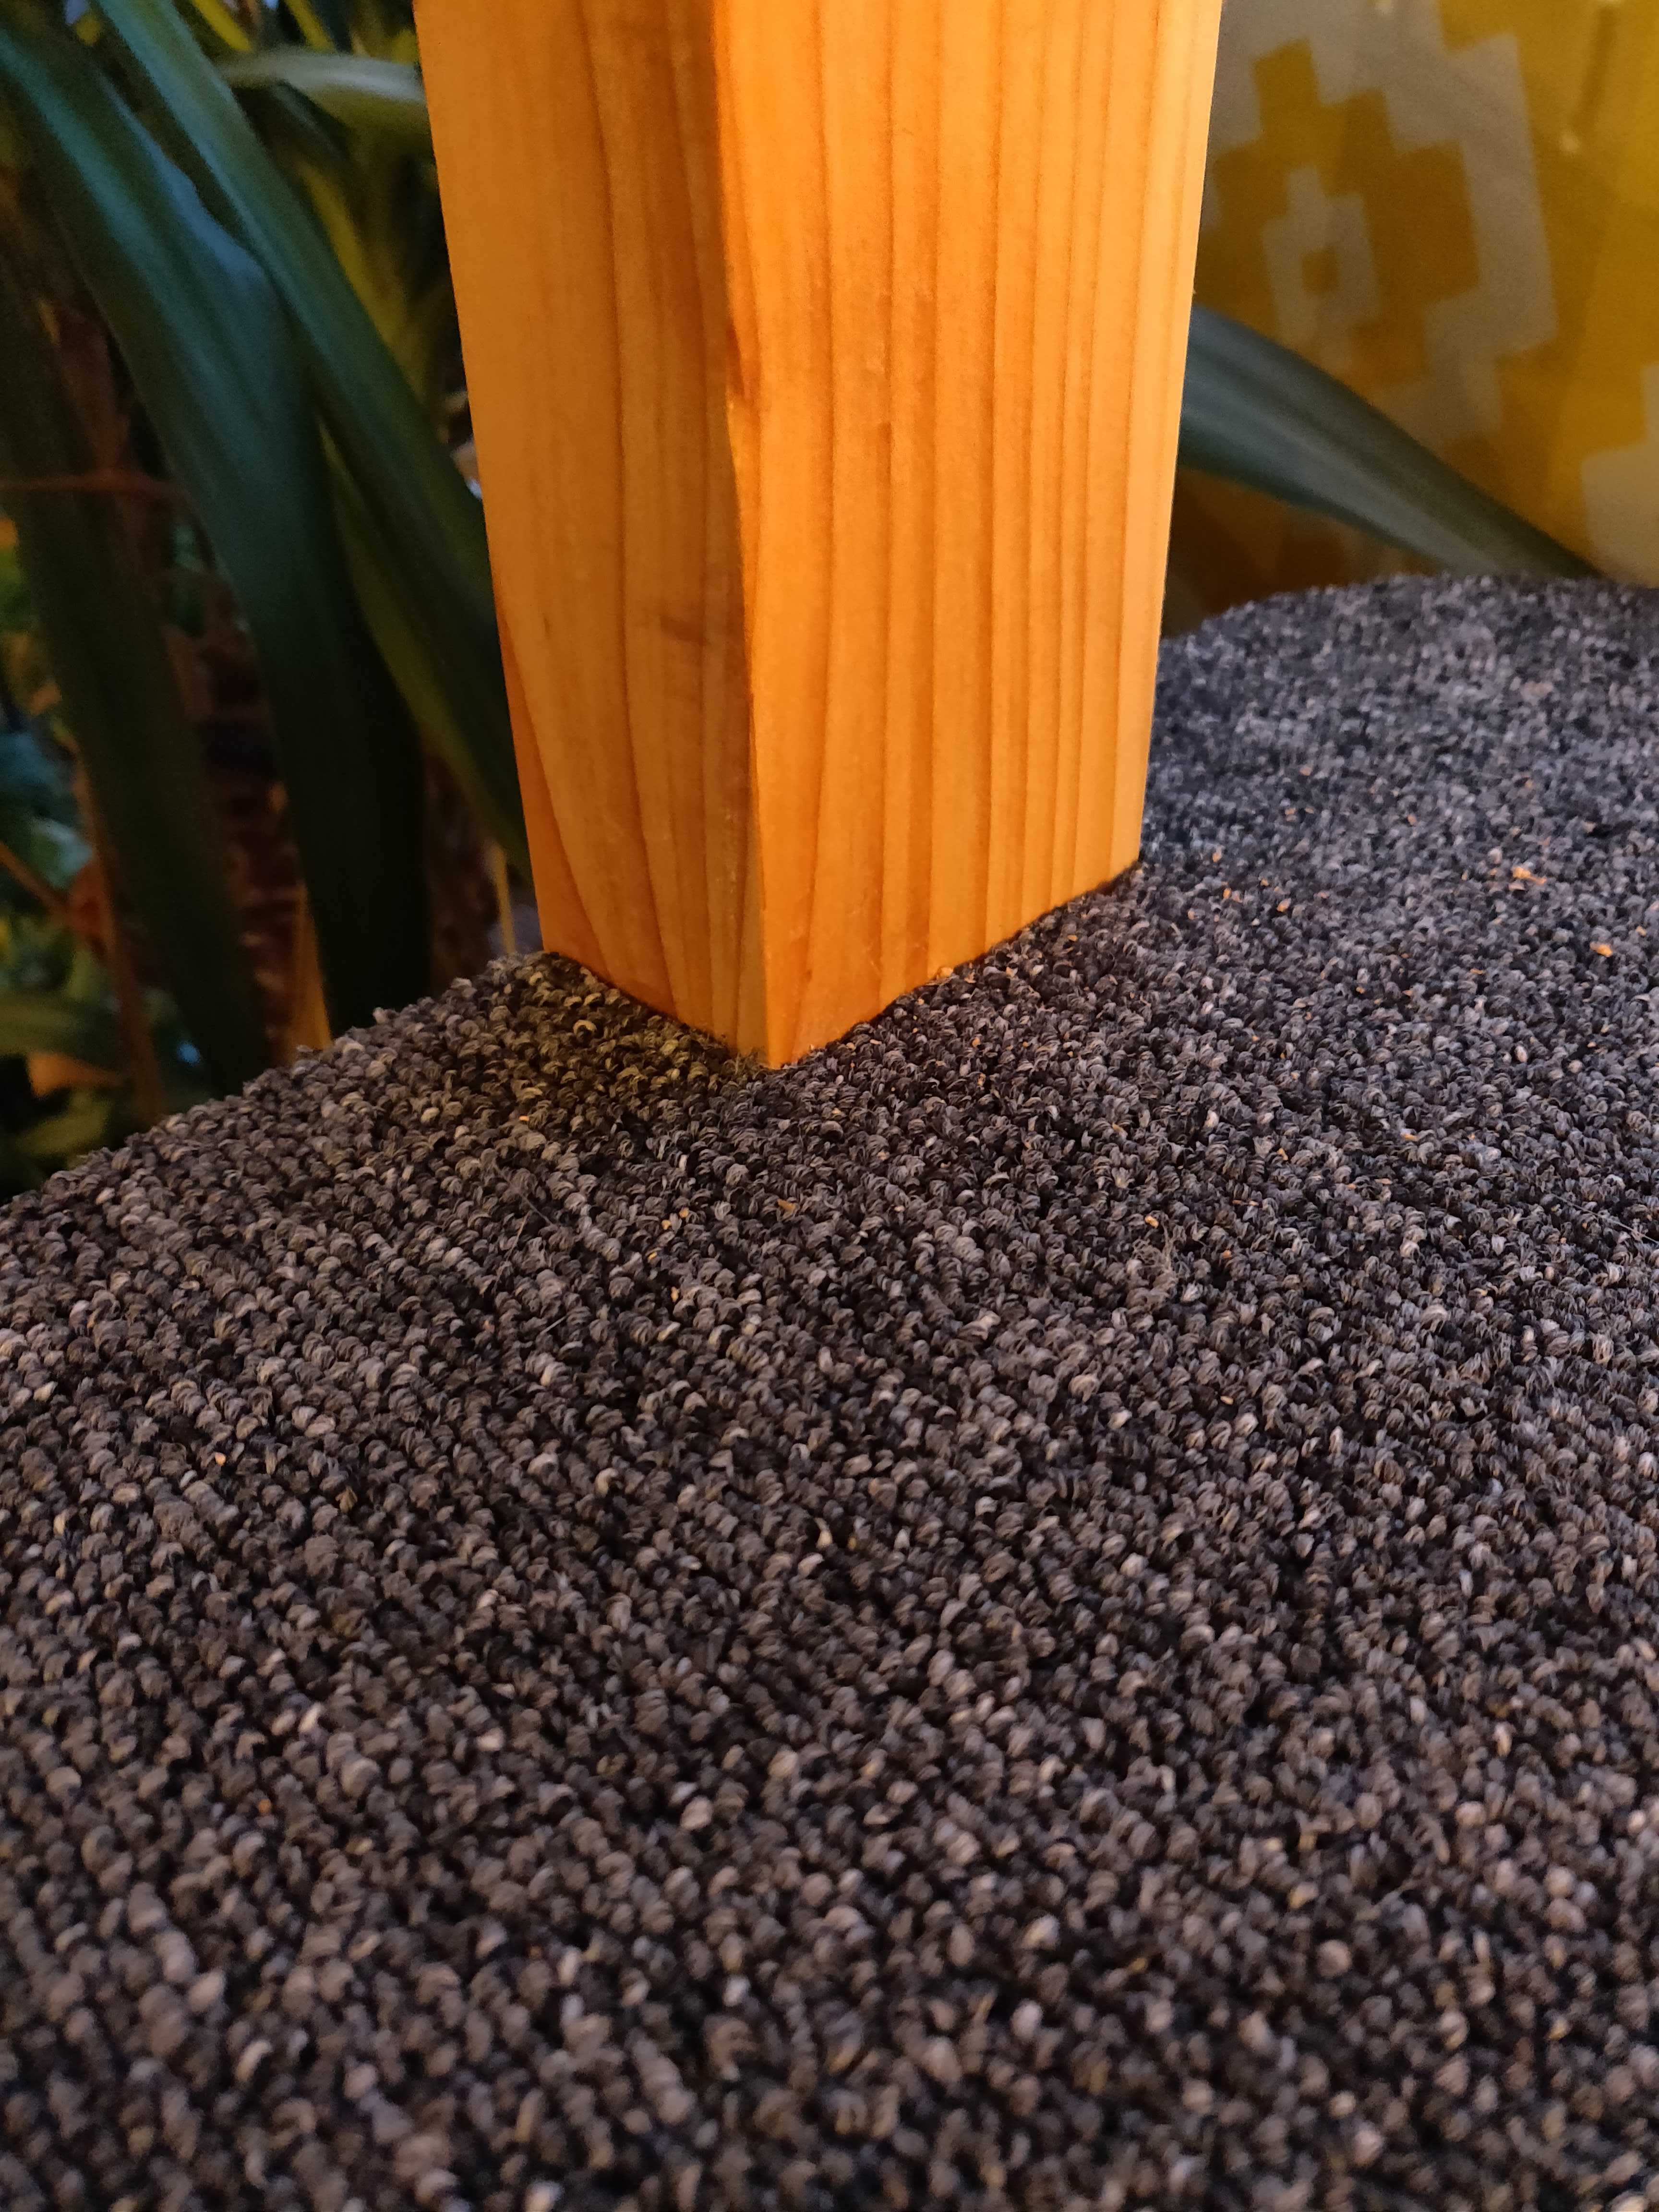
After breaking down the stock to length and squaring it up I took away the edges and drilled a hole in the top to secure a nut to hold an adjustable table foot to create pressure between the floor and the ceiling.
Next I mounted the pole on the base using a long screw in the center of the pole through the base and some 45° scaffold for stability. These scaffold are screwed from both sides of the base and I’ve finished the pole with linseed olie.
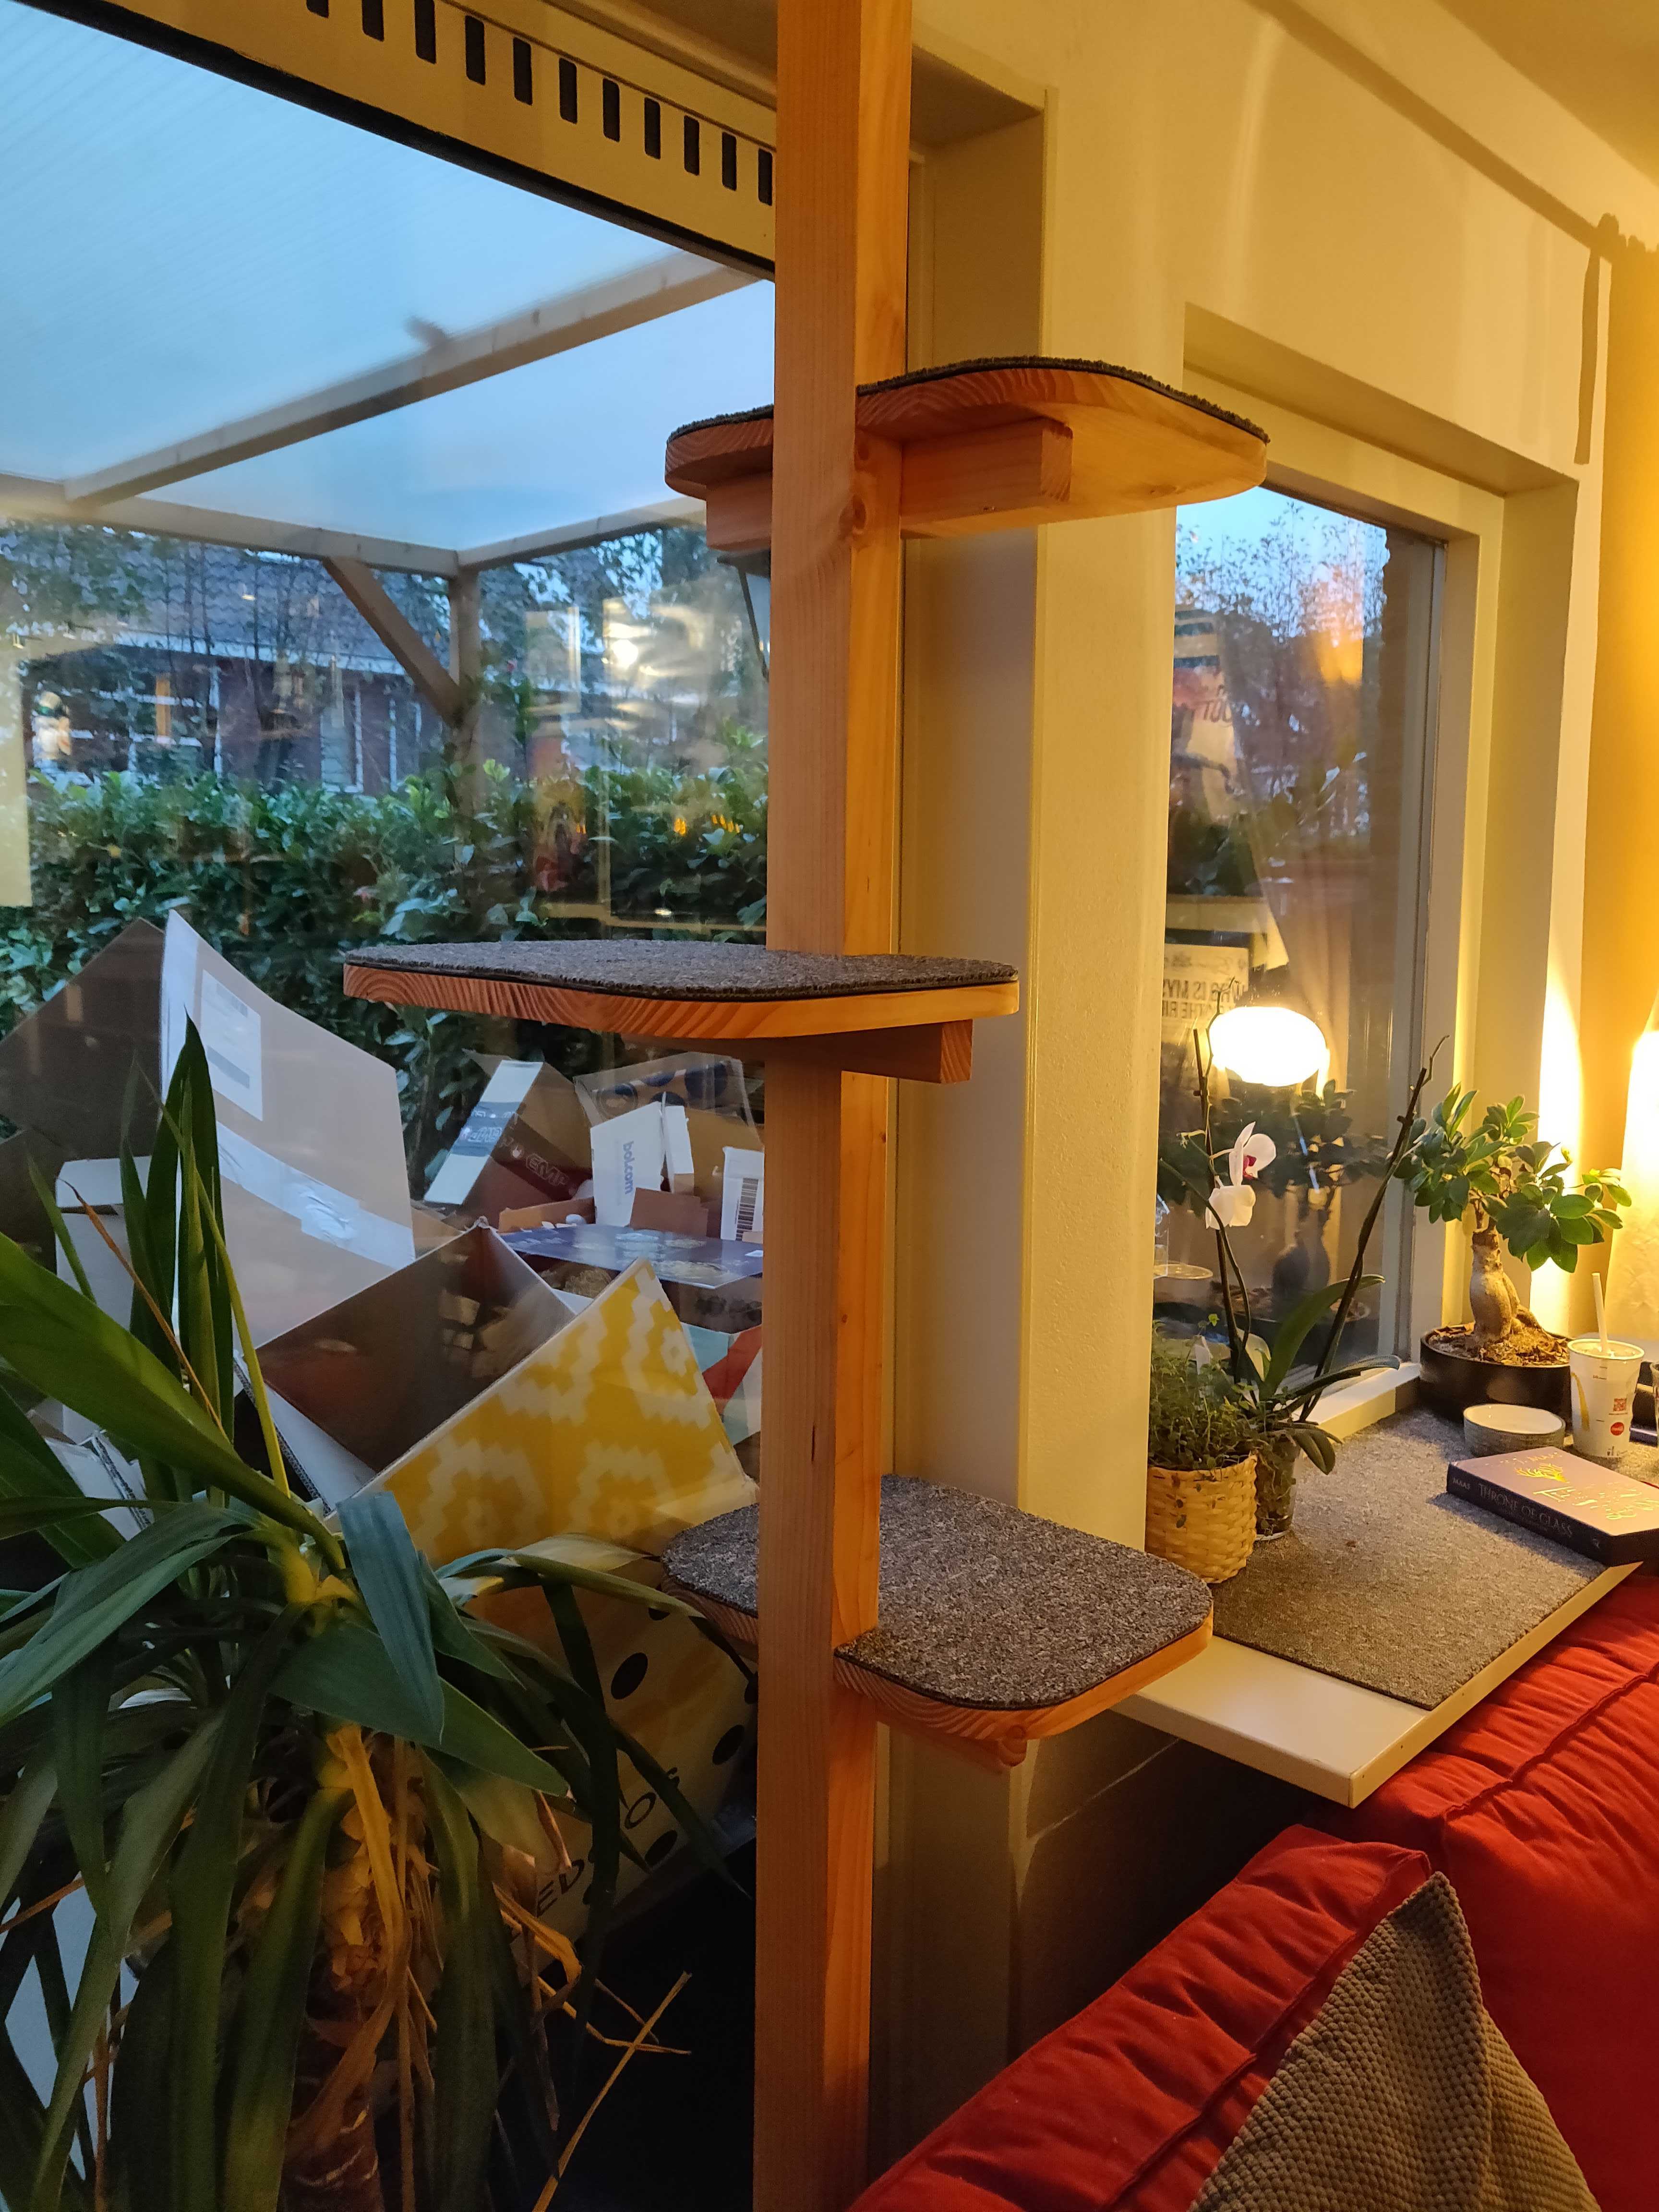
The shelves
For the shelves I had a board of 240x20x2,2 cm which I crosscut into 3 pairs of 30cm. I didn’t bother cleaning up the faces before edge jointing them because I knew I’ll be flattening them out when the glue dried. After flattening the faces I grabbed a pot lit and traces a radius around the corners, broke out the jigsaw and roughed out the corners after which I cleaned it up using a disc sander.
To connect to the shelves to the pole I used a piece of ribbed down 2x4 with 2 straight edges and 2 rounded over. The flat face will be the one connected to the pole. These supports are also screwed from both sides for strength.
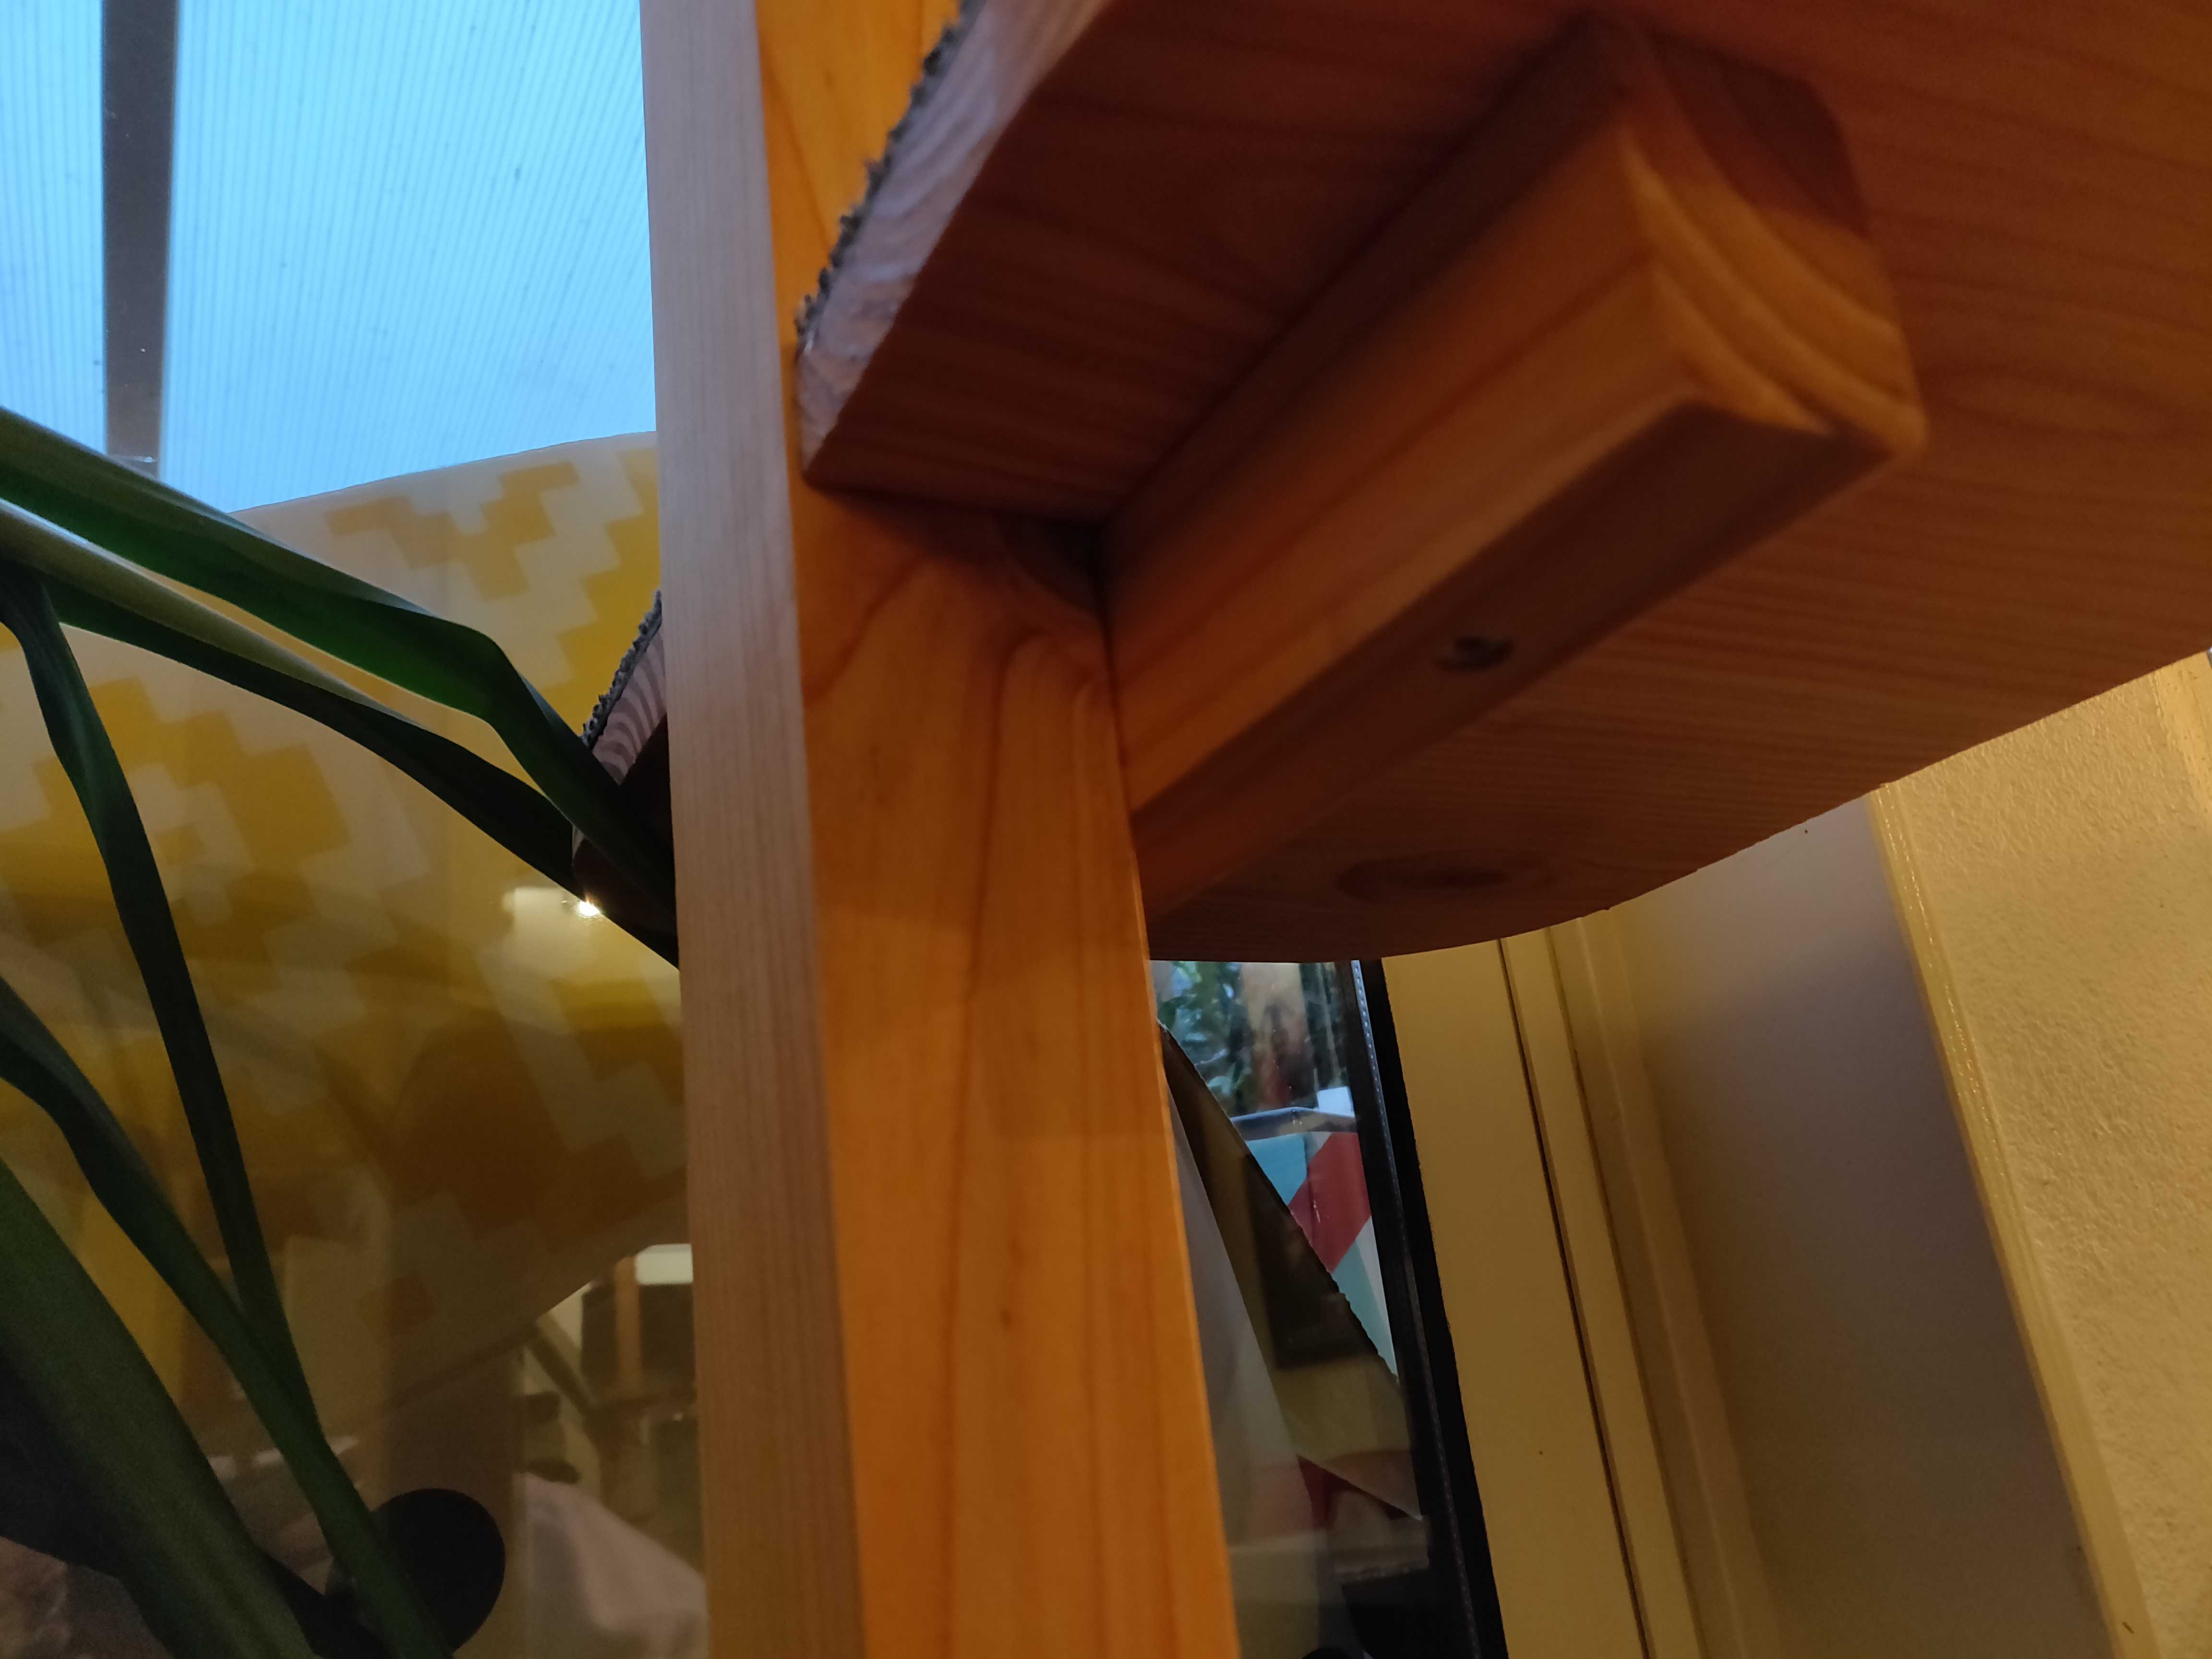
I did not want the shelve to protrude to much from the pole so I also made a nodge so the shelves “wrap around” the pole
To make the shelve more comfortable for the cats I covered the top face with carpet tile. I first glued the tile to the face using hotglue, so it wouldn’t move on me, and I cut out the shape of the shelve using a combination of exacto knives and box cutters using the edge of the shelve as a guide. This worked fairly well but was a very exhausting operation because when I was cutting too deep the resistance on the knife would increase drastically, so I took many shallow cuts and really took my time.
All together
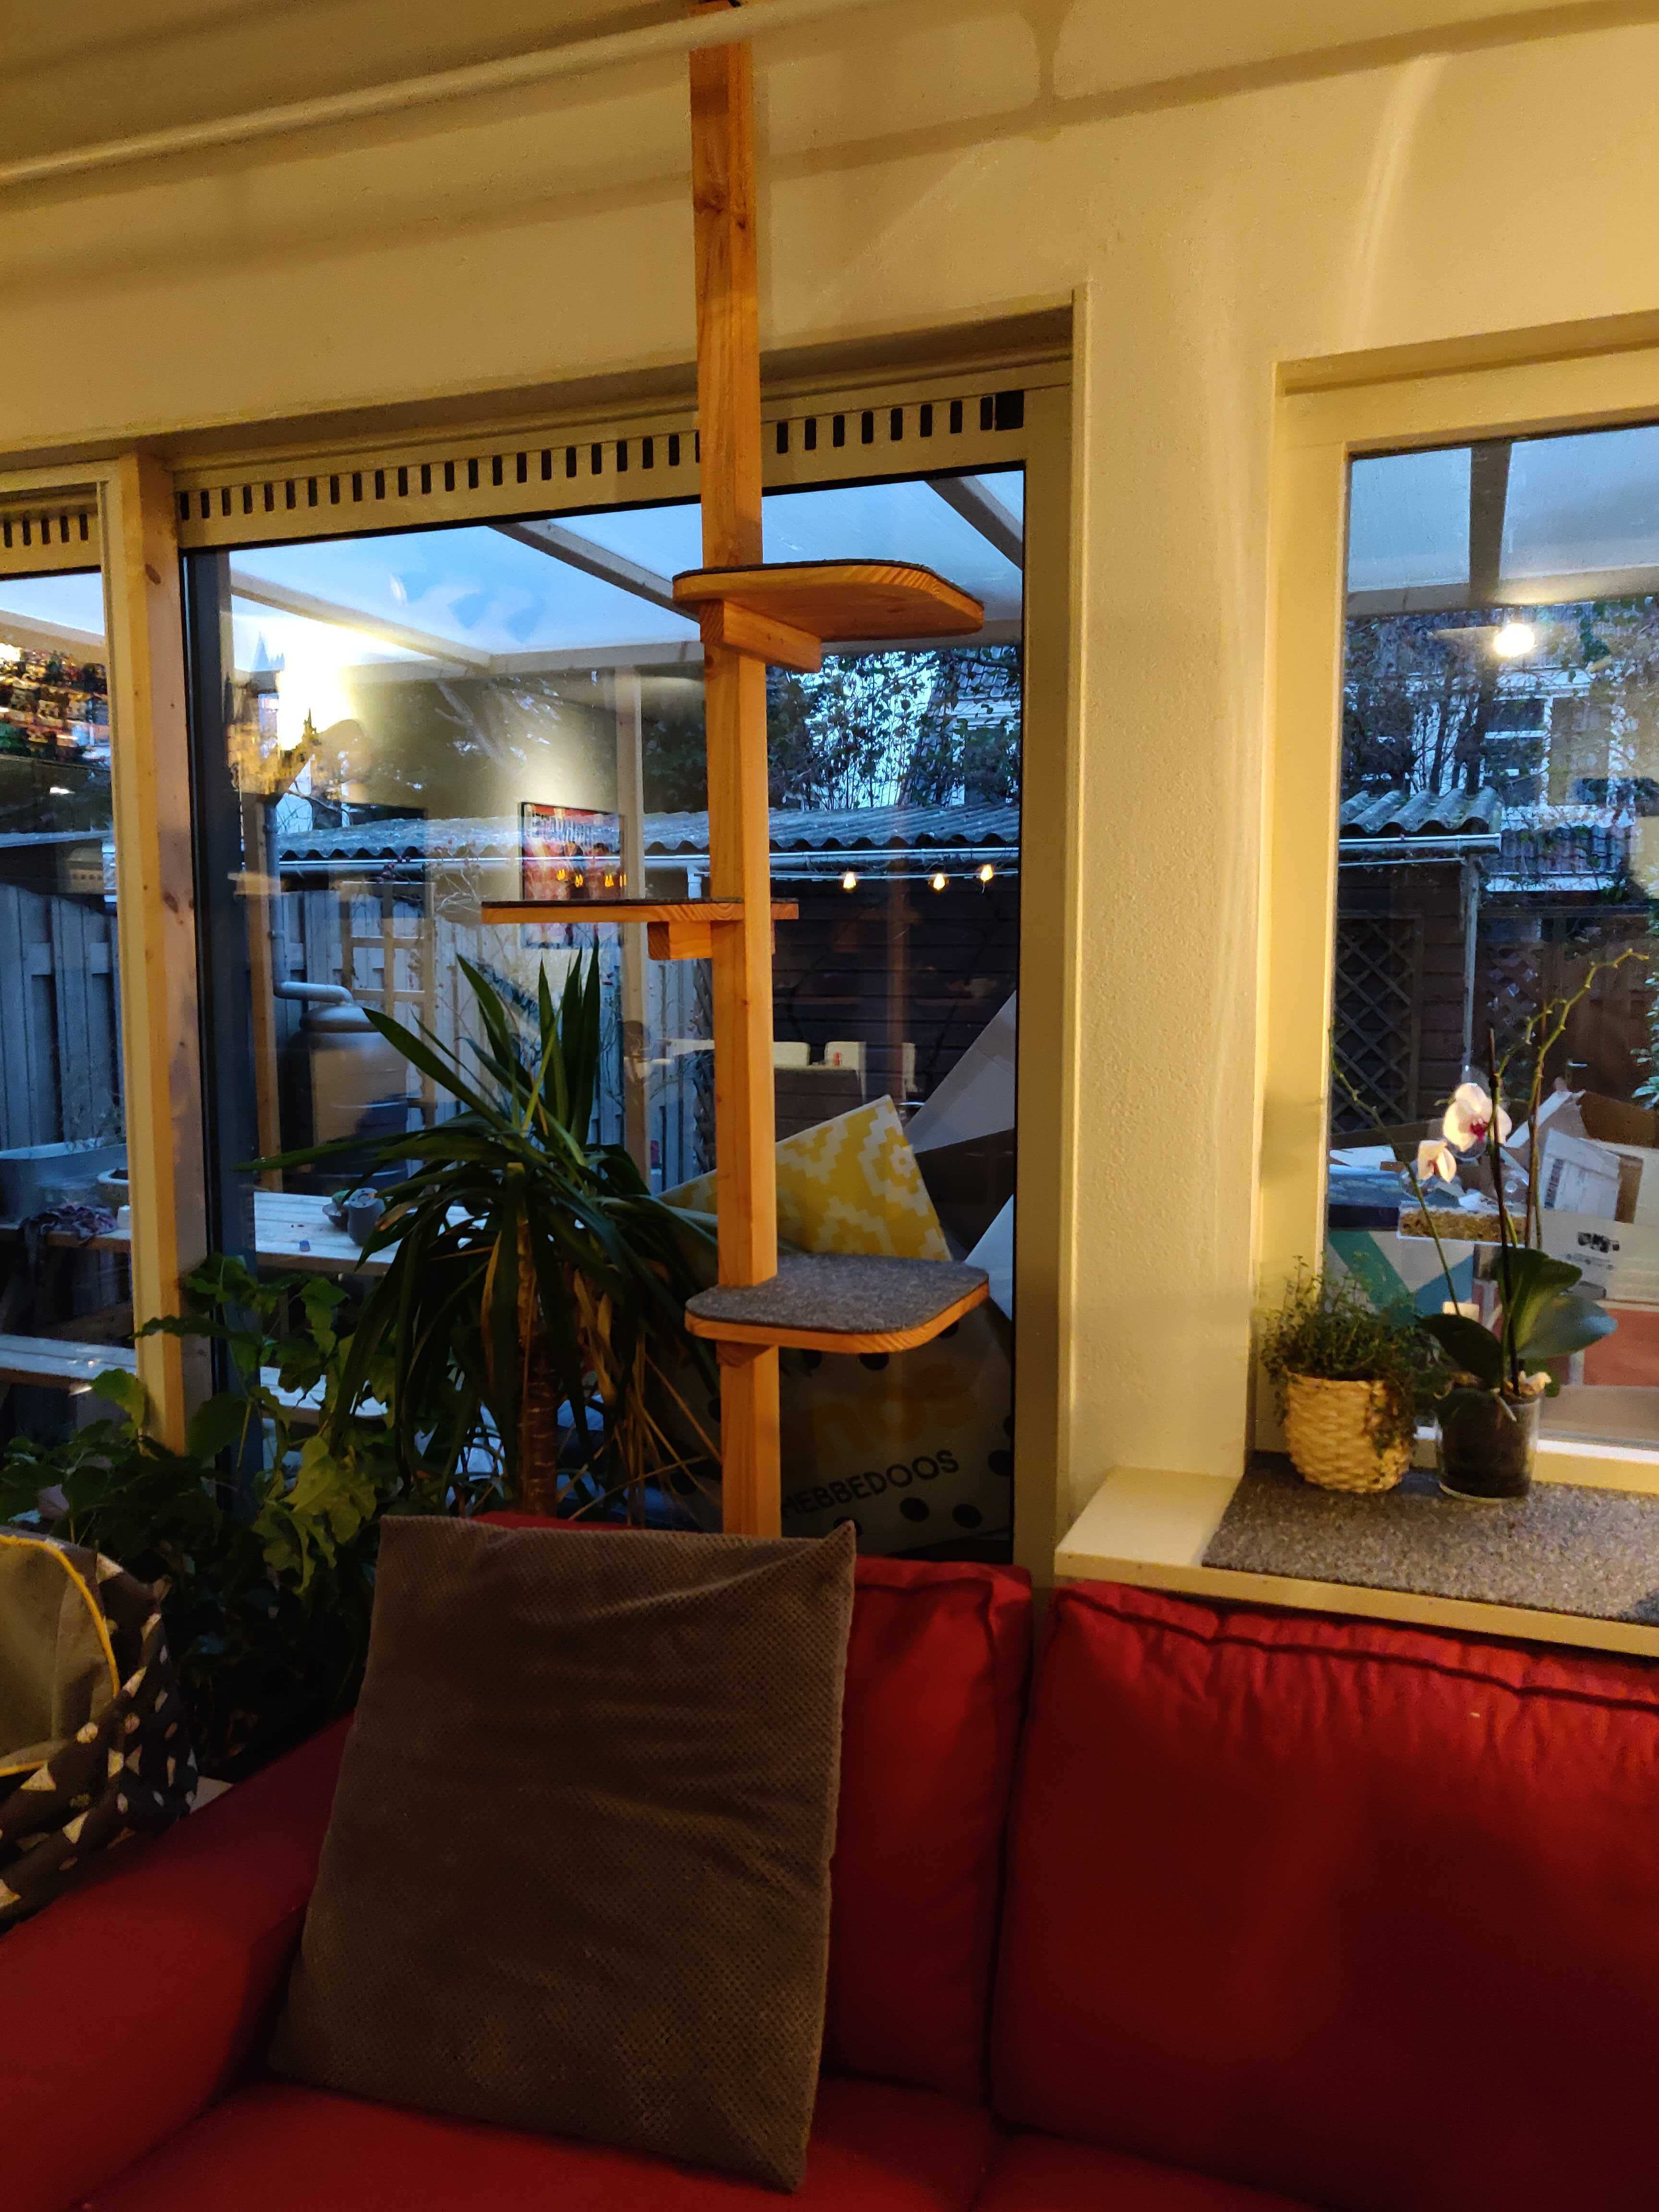
Overall I’m really happy with the result, I think it came out great and I learned a lot during the construction process.
Things we used
- Douglas 4 x 2
- 18mm plywood
- Douglas boards
- Carpet tiles
- Linseed oil
- Screws
- Scaffold
- Drill
- Jigsaw
- Hotglue
- Woodworking
- Lockdown stuff